Watching random videos on youtube can have several benefits. One of them is that you come across really cool things that people are doing. Tie Dying is one of those cool experiments. I came across this youtube video. And it inspired me to try this out! I thought you would require great amount of skill and effort to learn how to tie dye a shirt, but turns out I was completely wrong. It is not that difficult. And it is soooo much fun! Also, I have never done this. So yeah, one more of the never have I evers!
Materials Needed To Tie Dye
So, firstly, if you want to try this, the easiest thing is to buy a DIY Tie Dye Kit. I went for this one. It makes the process very easy. Comes with everything in one box. You literally do not need anything more than what there is in the box. Except obviously, a white tshirt and some water.
The Tie Dye Kit comes with the following :
- A set of 8 colorful dyes
- A set of 40 white rubber bands
- 3 plastic wrap
- 3 sets of plastic gloves
- A set of droppers
How to Tie Dye
Firstly, make sure you have enough time on that day. It took me a good 45 minutes – 1 hour to get through the process. And also, you need to keep the shirt dyed for about 6-8 hours and then wash it. So make sure you have that time. I did it on a Sunday and obviously did not have much going that day.
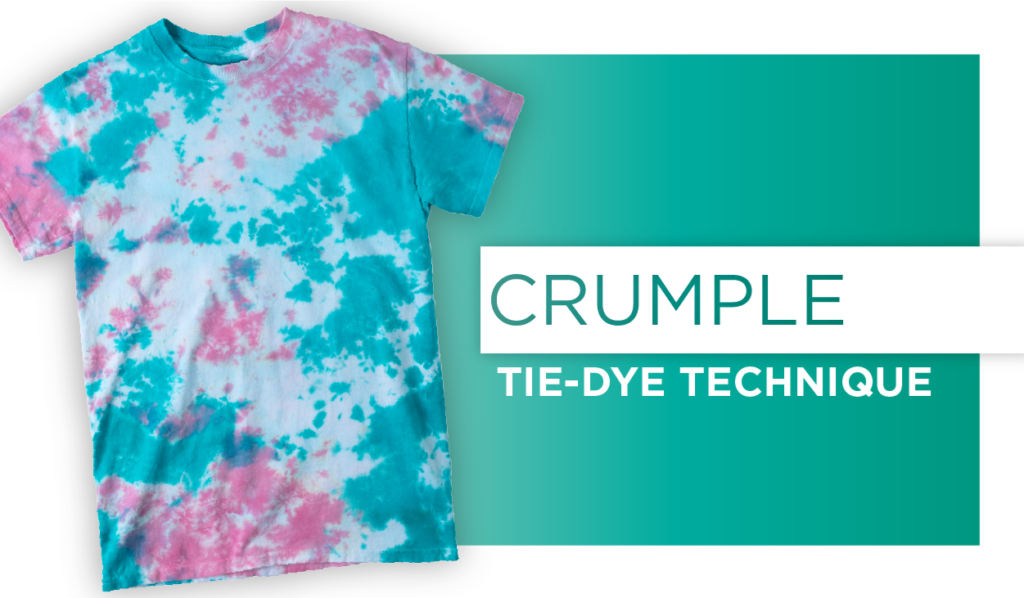
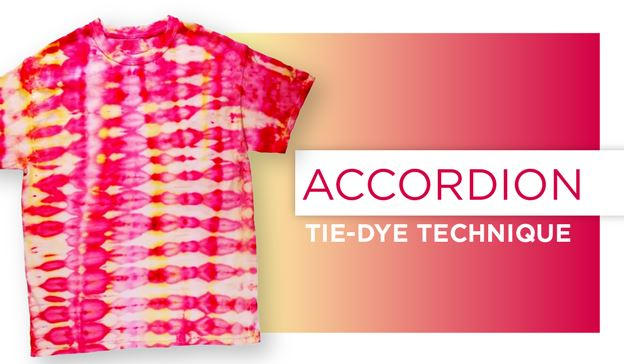
The first thing to do is to decide on the tie dying technique that you would like to follow. There are several techniques of tie dying and depending on how you would like the finished tshirt to look like, you can decide which one you like. Here are the pictures of some of the more popular ones :
Some of the more popular tie dying techniques :


I went for the basic one. The magic spiral one. Since that is the one I first saw lol 🙂
Once you decide on the dying technique, you just need to start folding the tshirt specific to the tie dye method. It is fairly simple and easy to do. Once you have that done, you need to secure the folds with the rubber bands. You make a flower like thing of the tshirt and the rubber bands and tada, you are ready to go.
The second step part of the process
After that comes the messy part. Firstly, you need to add water to all the dyes that you want and keep shaking the dye bottles until the powder is completely dissolved. Be mindful of how heavy the flow of your tap water is. I was super messy in this. Once that’s done, you need to find something on which you can do the actual painting. The thing is ideally you would want to do it on a surface through which the extra dye could fall off because otherwise it just rolls back to the other side. But apart from that, you can just start dyeing. The best part of the whole process!
Once you are done with that, you need to just wrap the tshirt in a plastic wrap and then wait for good 6-8 hours for the color to set in. Somehow, that is the most difficult part.
Depending on what intensity you want for the colors, you can keep it for longer. But I am usually a not very loud colorful person so I just waited for 6 hours. (I was also too excited so yeah). After that, you just remove the wrap, and then keep washing under the tap water until the water is mostly clear.
I promise you this is the last step. You just need to put in a little amount of detergent and wash the tshirt. Run the dryer and yay, you have the new tshirt. Here is how it turned out for me :
Tie Dye A Tshirt
Finallyyyy
So I am really happy I did this. It was so much fun. And seeing the final product makes you feel super super proud in like a very weird way.
Well, this was a fun post. Thank you for reading through. If you are looking for some diy fun thing to do. This is real fun! Leave a comment here or an email (dolifewithme1@gmail.com) if you do actually end up trying this. Follow me on instagram @myreallifeversion. See you there!
Read more about what I am up to most recently here. Also, read a bit more about me if you would like.
Categories: Uncategorized
Feya Shah
Living life one day at a time and on the side, telling you about it!